
Creating Advanced Reports
In addition to the standard reports the system provides and basic custom reports, you can create advanced reports with a report designer that uses combinations of tables, matrices, lists, and charts. You can create an advanced report starting with blank or system default settings or with settings based on another existing report.
To create an advanced report, do the following:
- Open Dashboard, click Application Links on the navigation panel, and then click Reports Manager under Reports.
- Do one of the following to display the Create New Report window:
- Select an advanced report in the grid, and then select New > Advanced > Use this Report on the Home tab to create a custom report using the selected report's settings.
- Select a group in the My Reports or Shared Library on the navigation panel, and then select New > Advanced > Blank Report on the Home tab.
- Enter the report information in the boxes provided.
 Explain the components of the window.
 - Click OK.
- Design the content and layout of your report.
- Click the Insert tab.
- Insert a table with your desired number of rows and columns.
- Drag fields into the table.
- For address fields in the table, do the following to change <BR> HTML tags from normal text to line breaks in the report:
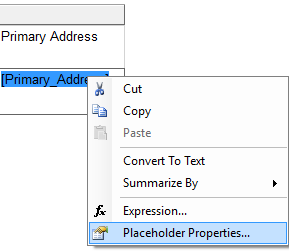
- Select the field name in the Data row (the bracketed text, such as [Primary_Address]).
- Right-click the text and select Placeholder Properties from the menu.
- Select HTML - Interpret HTML tags as styles and click OK.
-
Do one of the following:
- Select Save on the Report Builder Application menu to save your changes.
- Select Save As on the Report Builder Application menu to save, copy, and rename your changes.