Managing Custom Views
Views are used to save filtering criteria and any sorting options that determine the records and associated data that display in the Return Manager grid. Return Manager provides pre-defined views called static views. In addition to these system views, you can create custom views that define filters, columns, and sorting information. .
You can add, copy, edit, and delete custom grid views according to the different functions of your business using the Views tab. The Views tab displays when you select a folder or view on the navigation panel. The grid displays the existing records for the selected view. You can select multiple views to perform some actions, such as delete, but only one view displays in the grid.
Grid manipulations, such as sorting and filtering, are not saved. Only changes made to view definitions are saved.
 Add
Add
To add a new view, do the following:
-
Open an existing view that you want to use as a base for the new view.
-
Select View > Edit Columns on the menu bar.
-
In the Columns screen, you can add, remove, or arrange the columns to your preference.
-
Click Done.
-
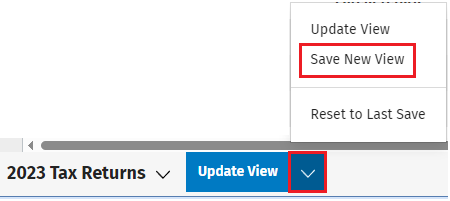
Click the Update View drop-down (located in the lower left corner of the grid).
-
Click Save New View, to add a new view.
-
Enter a Name for the view and click Save.
Modify
Use the Save View As option to save a copy of information from a selected view, creating a new view. You will also have the option to save the new view as a private or a shared view.
To modify an existing view, do the following:
-
Open an existing view that you want to modify.
-
Select View > Edit Columns on the menu bar.
-
In the Columns screen, you can add, remove, or arrange the columns to your preference.
-
Click Done.
-
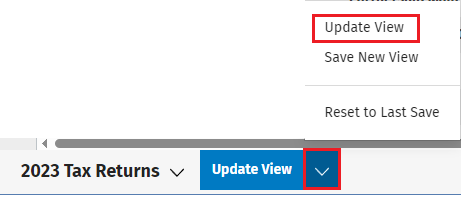
Click the Update View drop-down (located in the lower left corner of the grid).
-
Click Modify View, to update an existing view.
Delete
To delete a view, do the following:
-
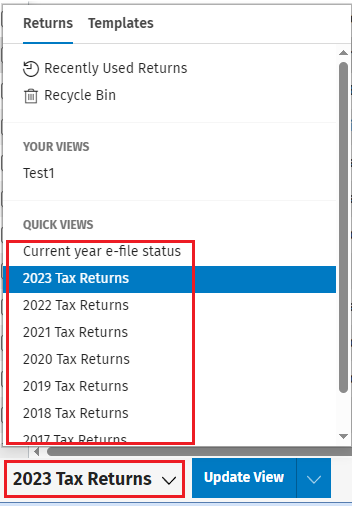
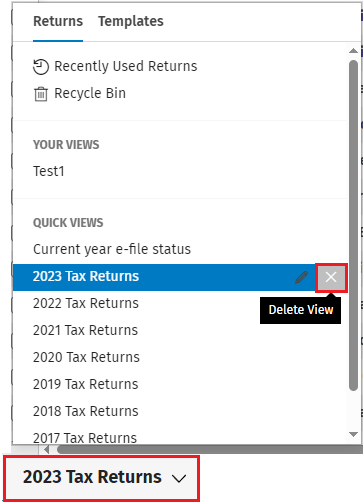
On the return manager screen, use the drop-down in the lower left corner of the grid to see a list of the views.
-
Locate the view to be deleted and click the X on the right side of the view Name.
-
Click Delete to confirm the deletion.